
Here is how you can set a Password Expiry date in Windows to be more Secure
Can you set a Password Expiry date on your Windows 10?
In a world where your cybersecurity can be compromised in a matter of seconds, it is highly essential to change your passwords at regular intervals. Thankfully, Windows 10 has brought in something which will highly benefit users to protect their data and help them in remembering to keep a proper check and balance on their accounts.
The phenomenon we are referring to is the Password Expiry Date option; through which you can set a specific date and time when your password will automatically expire and you will have to update your password once more.
Some of you might be aware that Windows 10 always encourages users to use their linked Microsoft Account to log in rather than their local accounts. The added benefits of using a linked Microsoft account are plentiful. For starters, by using a linked Microsoft Account you will be reminded to change your password after every 72 days!
How to set an expiration date for a linked Microsoft account?
- Head on to the Microsoft Account Security Basics and login with your account.
- Look for ‘Change Password’ and click on the option ‘Change’ as highlighted in the red box.
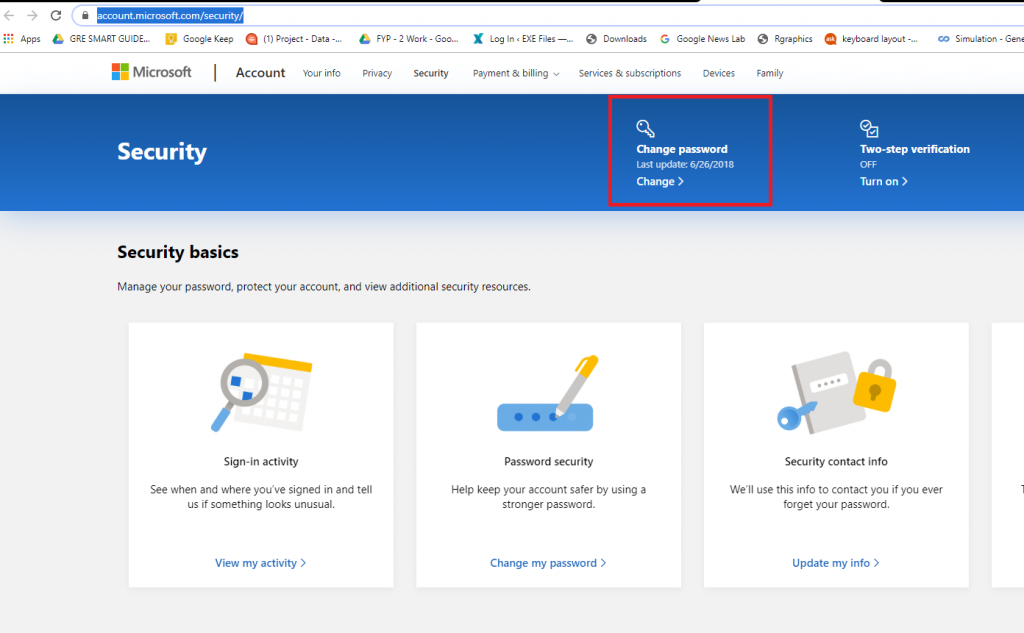
- Enter your current password for verification.
- Enter your new password and re-enter the new password and tick on the box which says ‘Make me change my password every 72 days’.

- Click on ‘Save’
If your attempt is successful, you will be redirected to the Microsoft Account Security Area Homepage. What you may want to do afterward is recheck your password by signing in and signing out. Keep in mind that after exactly 72 days of you will be asked to change your password.
Repeating this process can help you up the game for your Cybersecurity!
How to set an expiration date for a local account?
By default, if you set a password for the local account in your Windows 10 it will never expire, but thankfully there is a way through which you will be able to set an expiration date for your password even for a local account.
The added benefit of using a local account is that you get to decide the number of days for the expiration of your password!
- Press the Windows ‘Win + R’ key to access the ‘Run’ option.
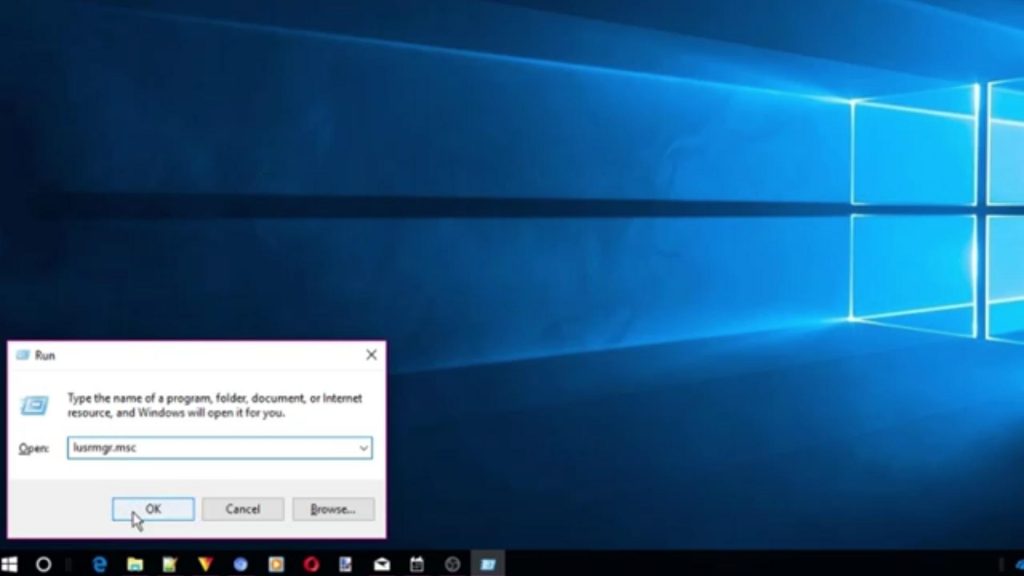
- Type ‘lusrmgr.msc’ into the search bar, click on ‘Ok’ and the Group Policy Editor will open in front of you.
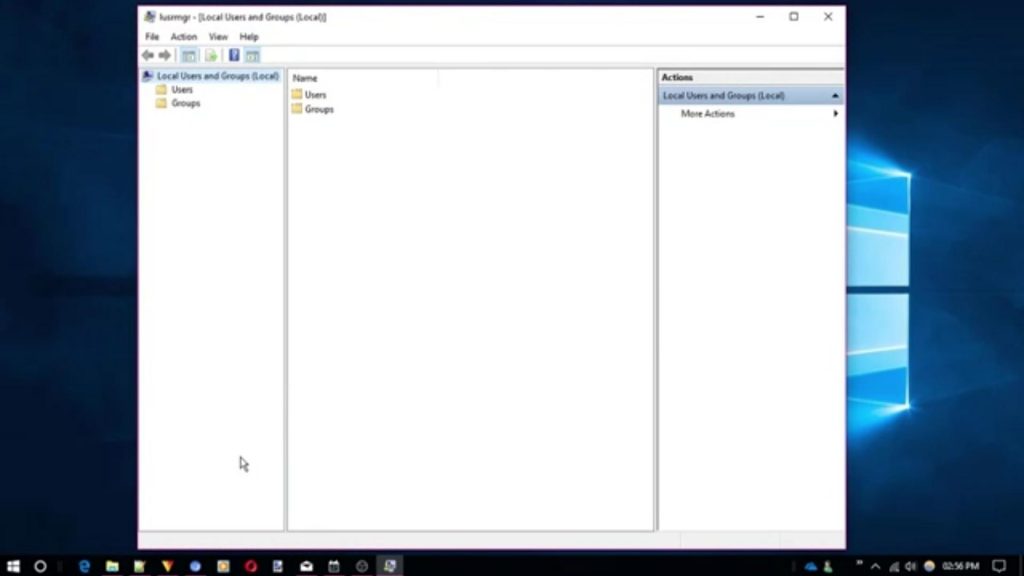
- Double click on the ‘Users’ option and then click on the desired local account on which you wish to set an expiry date for the password.
- By default, you will notice that the ‘Password Never Expires’ box is always ticked. Untick the box and then press okay.
This is how you can manually set the option for password expiry. Now, let us take a look at how you would be able to set the number of days for the expiration.
- Press Windows ‘Win + R’ key to access the run option.
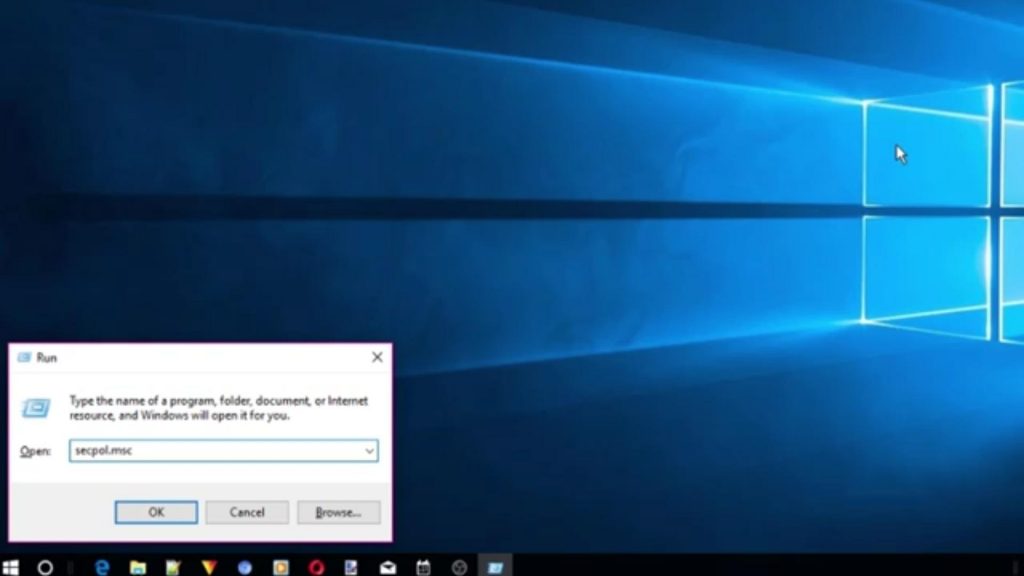
- Type ‘secpol.msc’ into the search bar, click on ‘Ok’ and you will see a new window opening in front of you.
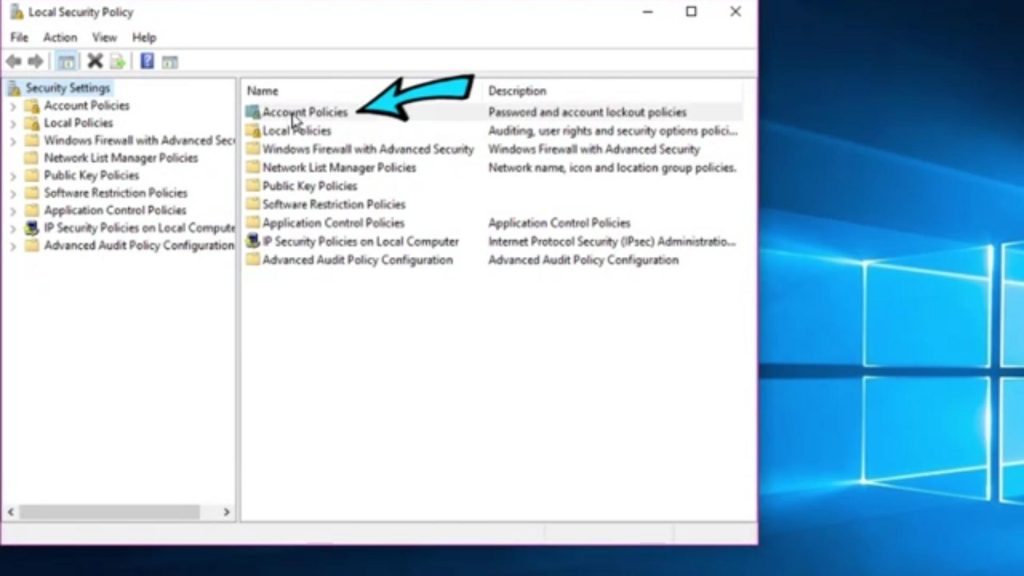
- From the new window, double click on the option ‘Account Policy’.
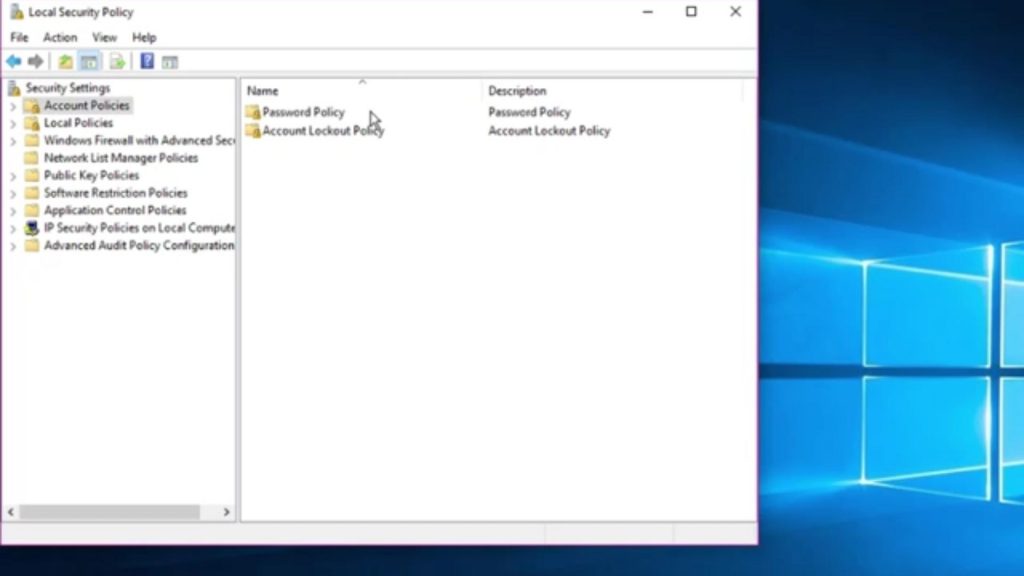
- Now double click on the option ‘Password Policy’.
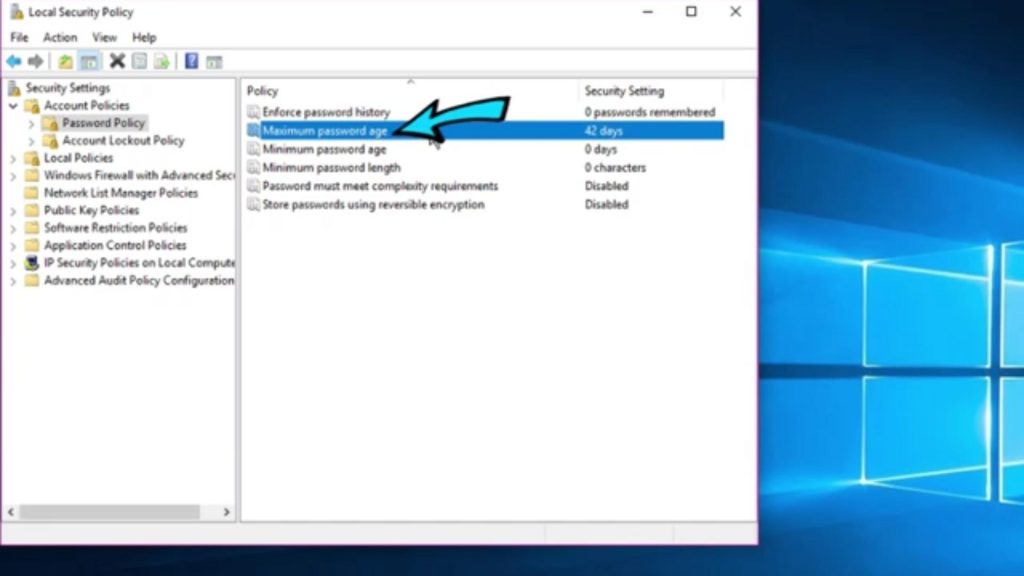
- Select the option which says ‘Maximum Password Age’.
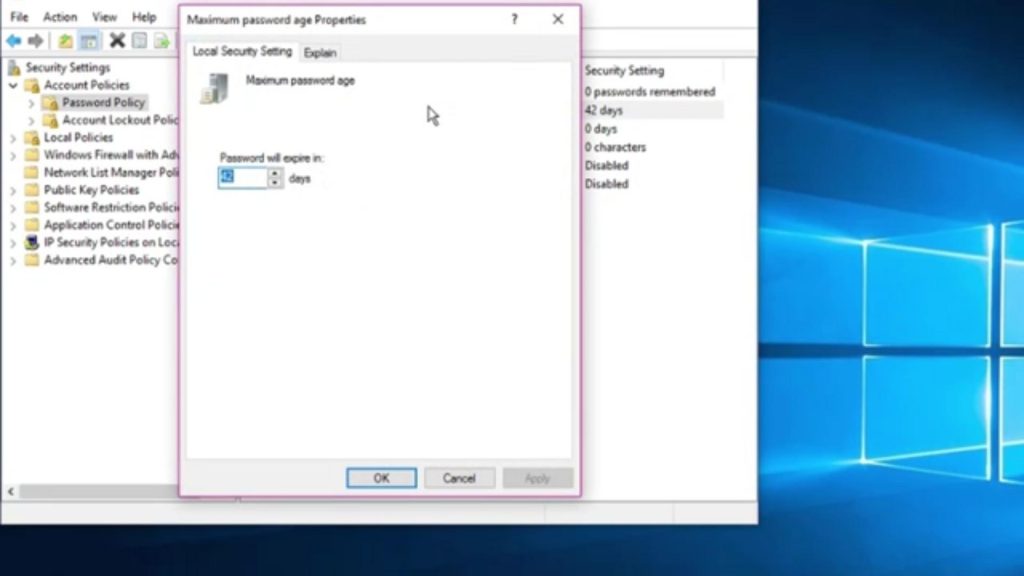
- You can now type the number of days the password will be valid for and then press ‘Ok’.
As mentioned above, the best part of setting a password expiry date from a local account is that you get to choose the number of days rather than the Microsoft Linked Account which will expire the password after exactly 72 days.

