Here is how you can take a Screenshot with One Key Click in Windows
One of the advantages of having a full-featured, customizable operating system like Windows is the abundance of freely available third-party apps as well as a ton of useful, built-in utilities, that make daily work and basic tasks much easier. It is one of the many advantages Windows has over mobile Operating Systems like iOS and Android, which make it easily desirable for work tasks.
A screenshot is basically a snap of the currently visible content on your screen and in today’s world, almost every operating system supports it. However, Windows has always had a pretty simple screenshot taking mechanism which just allowed you to press a couple of keys to capture the whole screen and save it in your picture gallery. It did come with a nifty little tool called the Snipping Tool which offered more customization as well as more options like timed delays and different Modes.
Earlier, we covered a guide on how you can use the newly introduced snipping tool in Windows and capture screenshots using a shortcut combination of keys. Now, we have come across another nifty little trick that allows you to take screenshots even more easily using the same tool – by one simple key press. Here is how you can do it,
Taking Screenshots with One Key
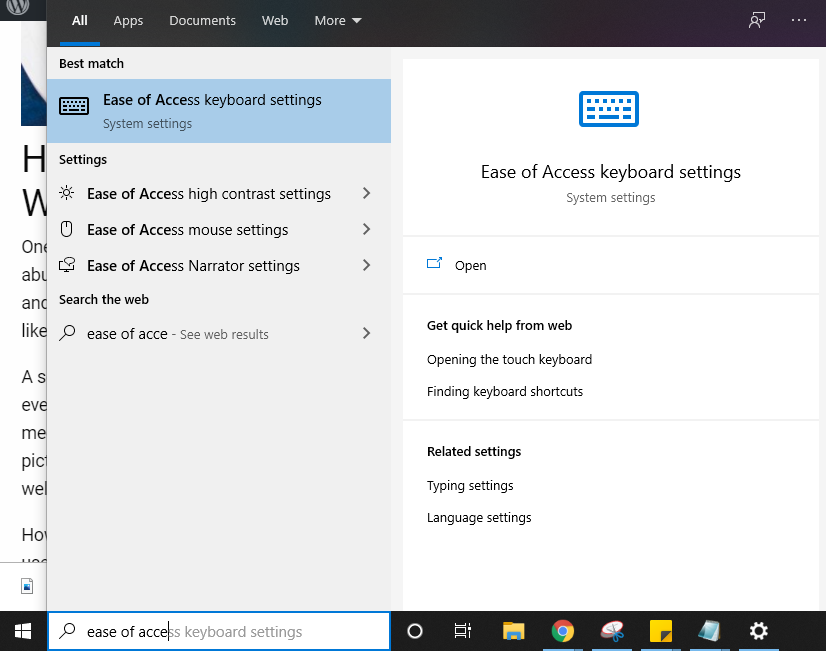
- Press the Start button and search for Ease of Access keyboard settings and click on the first search result that appears.

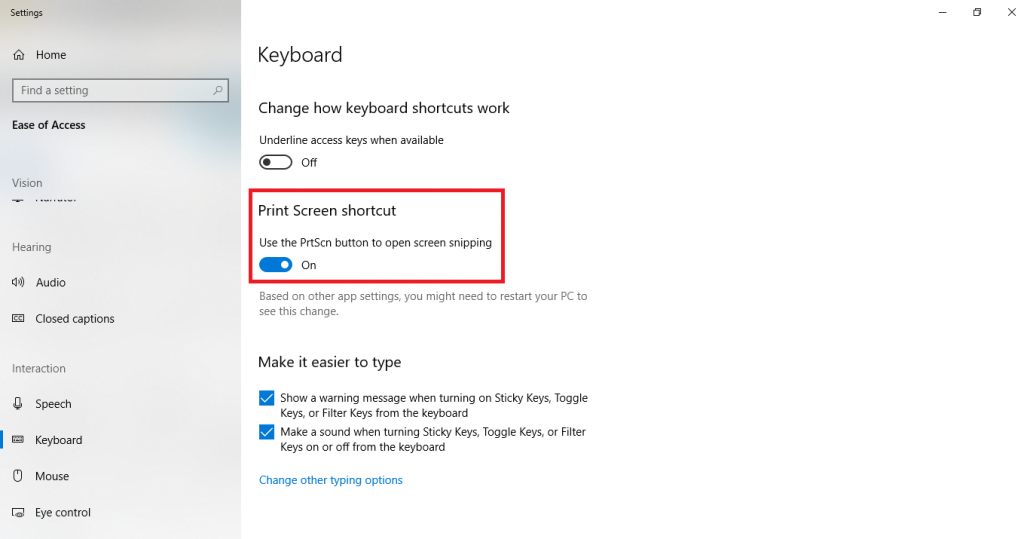
- On the right-pane, scroll down until you find the settings titled Print Screen shortcut.
- Switch it to On, as shown in the screenshot below.

That’s it. Now, it will enable the ability to take screenshots by simply pressing the PrtSc key on your keyboard.
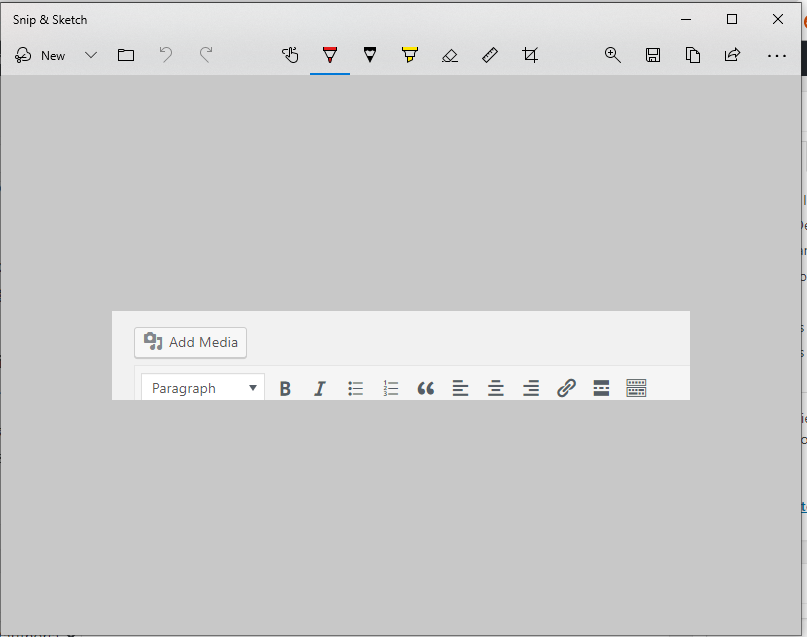
When you click it, it will open the new Snipping tool view, allowing you to simply cut the area you want to take a screenshot of and show it in a handy little editor that allows you to annotate and draw over your screenshot as well using different tools like a marker, highlighter, and more.


