Here are all the ways you can unlock your Windows PC
Our smartphones have moved on to newer and more innovative ways of allowing you to sign in to your devices, like fingerprint sensors, face recognition, and even iris detection, in the case of Samsung. However, most of our PCs still rely on a PIN or a password to allow you to unlock your PC.
As technology has advanced and security and privacy of our information have become a growing concern, there has been a renewed focus in making secure and more advanced locking mechanisms. While passwords and PINs may still be the most secure ways to unlock a device, they are far from being the most convenient options. It is quite an inconvenience to remember a password to unlock your PC each time. It is also way more time-consuming.
Fortunately, Microsoft allows you to use a whole host of options to unlock your Windows PC, from using the password from your online Microsoft account to a locally-stored PIN to Face Recognition using the Windows Hello platform to even third-party solutions that allow you to use a USB device as a way to unlock your PC.
Here, we will cover some of the ways you can unlock your PC,
1. Unlock your Windows 10 PC with a Local Password
When you are setting up your Windows 10 PC for the first time, Microsoft asks you to set up your PC with a local password or a Microsoft account. This is your local account password that is saved on your PC. If you choose local password, you won’t be able to change it by going online and clicking on Forget Password on your account page. However, it is also more secure in a way that even if someone knows your laptop’s password, they cannot change it without physical access to your laptop.
2. Use a Microsoft Account
If your PC is synced with your Microsoft account and/or you used your Microsoft account to set up your PC, it will allow you to login using your Microsoft account credentials. Here is how you can do it,
- Start your PC.
- When you come across the login screen, enter your email associated with your Microsoft account and then enter the password.
That’s it. Your PC should login with your Microsoft account credentials if your PC is paired with it. If you don’t remember your account’s password, you can also use any browser to access the Microsoft account portal.
3. Use a PIN
Entering your Microsoft account password can be quite cumbersome if you have a habit of leaving your PC turned on but still want it to lock to keep your data and PC secure. Entering the password again and again after a while can get quite annoying. Alternatively, Microsoft allows you to set a four-digit PIN, allowing you to quickly unlock your PC. Here’s how you can set it up,
- Open the Windows Settings app or press START + I to open it.
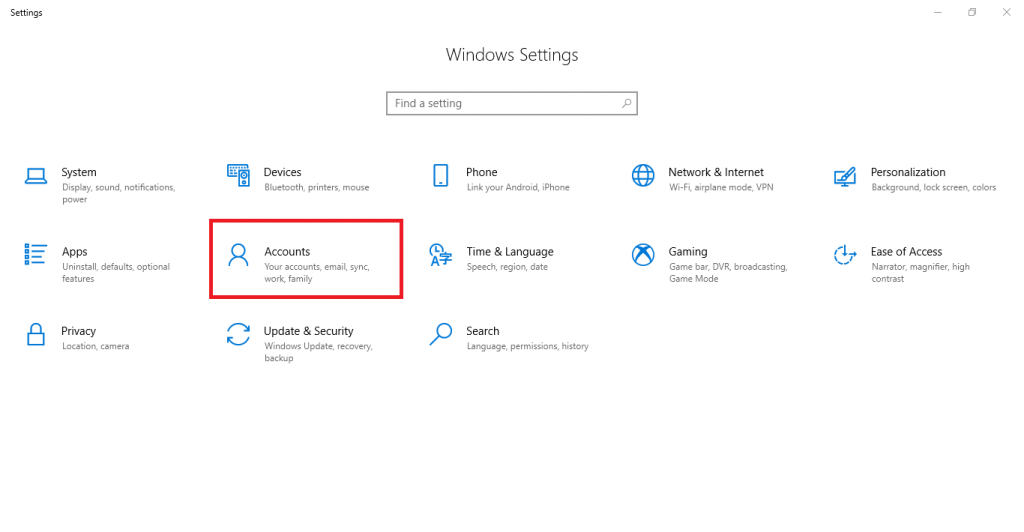
- Click on Accounts.

- Click on Sign-in options from the pane on the left.

- Scroll down to the PIN section.
- Click on Add.

- Windows will ask you to enter your password to verify that you’re the real owner of the device. Just enter the password which your computer is configured with.
- Windows will ask you to enter the PIN. By default, a PIN consists of numbers. You can also click on the little checkbox to include letters or numbers in your PIN.

That’s it. Now, whenever you try to login, Windows will give you two options. Just click on the Sign-in options text on the lock screen to choose either the PIN or Password to log into your device. If you don’t like the PIN password or would like to remove it, just go back to the Sign-in options menu and go to PIN and click on Change or Remove.
4. Set up a Picture Password
Just like pattern locks on Android, Windows also has its unique way of unlocking your device: Picture Passwords. You can set any picture as your password and then set some gestures like three lines, dots, or circles, and only when you make those gestures, your device will unlock. It’s a little complicated but once you try it out, it does seem pretty cool and intuitive. The trick is to keep your gestures complex enough so as not to be easily guess-able by an onlooker, but simple enough to remember and execute in a moment.
Here is how you can set it up,
- Open the Windows Settings app or press START + I to open it.
- Click on Accounts.

- Click on Sign-in options from the pane on the left.

- Scroll down to the Picture Password section.
- Click on Add.

- Windows will ask you to enter your password to verify that you’re the real owner of the device. Just enter the password which your computer is configured with.
- Click on Choose picture in the left pane to choose any picture of your choice. Microsoft will guide you as to how you can set your gestures throughout the whole process.

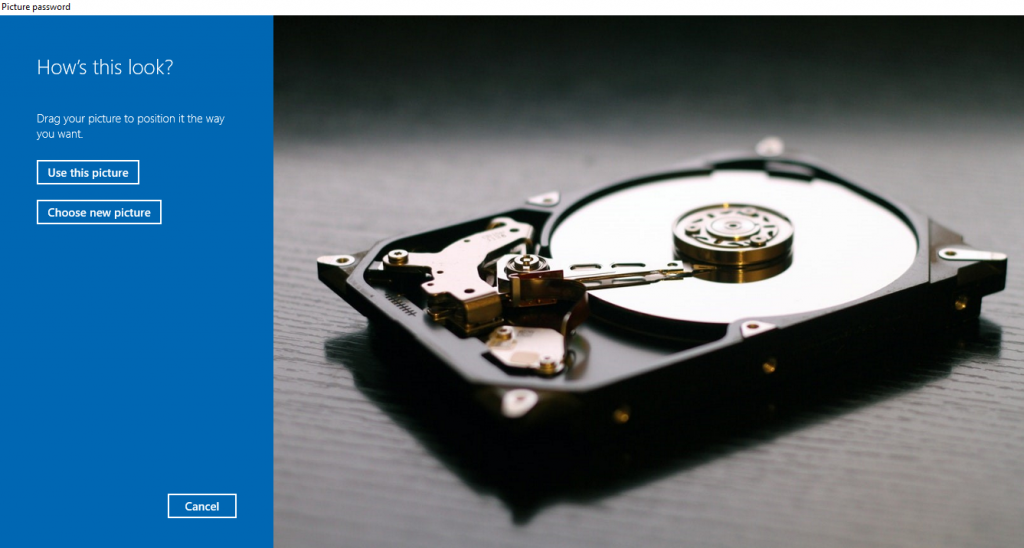
- Once you have chosen a picture, you can drag it to position it the way you want. Once you’re done, click on Use this picture.

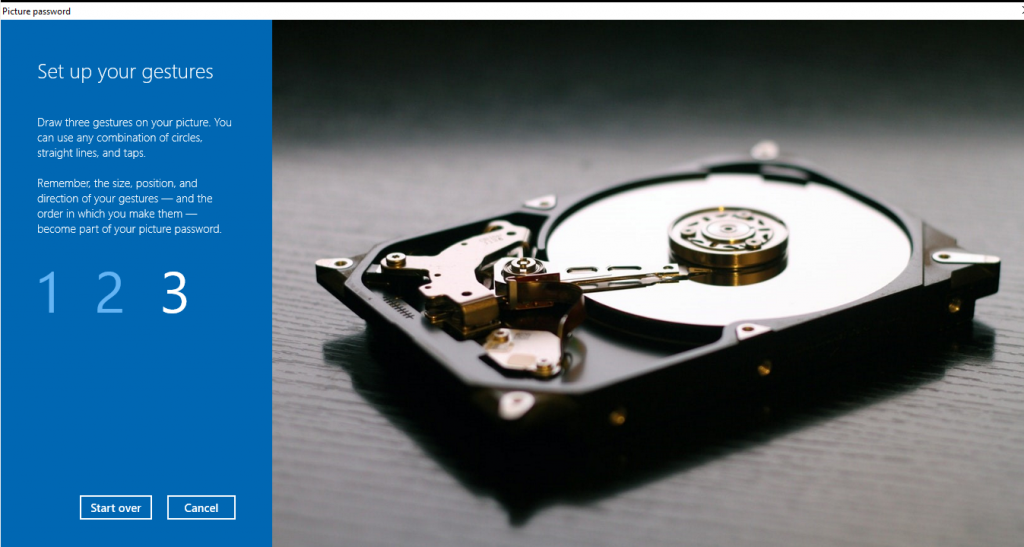
- Microsoft will let you perform three gestures which can be anything from a line to a circle or a dot.

That’s it. Now, whenever you try to login, Windows will give you two options. Just click on the Sign-in options text on the lock screen to choose either the Picture Password or Password to log into your device. If you don’t like the picture password or would like to remove it, just go back to the Sign-in options menu and go to Picture Password and click on Change or Remove.
5. Dynamic Lock
You can also use another nifty little feature in Windows called Dynamic Lock, which allows you to lock your PC as soon as the devices paired to it go out of range. For example, if you use a Bluetooth wireless headset and it is paired to your PC, you can just get up and walk away from your PC and as soon as you’re out of range, Windows will automatically lock your device.
Here is how you can set it up,
- Open the Windows Settings app or press START + I to open it.
- Click on Accounts.

- Click on Sign-in options from the pane on the left.

- Scroll down to the Dynamic Lock section.

- Check the box against Allow Windows to automatically lock your device when you’re away,
6. Using Windows Hello
One of the latest additions to Windows 10 has been the ability to login to your PC using Windows Hello. Basically, Windows Hello isn’t an unlocking option itself, it’s just an umbrella for a list of biometric unlocking features that are now supported by Windows. Thanks to Hello, you can now login using your face, your iris or even your fingerprint (if supported by your device).
Here is how you can set up Windows Hello,
- Open the Windows Settings app or press START + I to open it.
- Click on Accounts.

- Click on Sign-in options from the pane on the left.

- Scroll down to the Windows Hello section. Your device should support Windows Hello functionality, otherwise, it’ll show that Windows Hello isn’t available on this device.
- Click on Set up in front of the unlocking feature you want to enable (Face, Fingerprint, etc.).

- It’ll guide you the process of setting up face recognition.
That’s it. Once you are done, you can log into your PC using your Face, Fingerprint, just like you’d normally log in using PIN or Password.
7. Use a USB Drive
You can also use a USB to act as a secret key that can be used to lock/unlock your Windows PC. Not only is it quick and easy to just plug in your USB to log in to your PC, but it is also pretty safe as no one can log into your PC without having access to the key. Moreover, a USB is small enough to carry in your pocket everywhere. Windows doesn’t have native support for this kind of functionality, but you can use a third-party software like Predator for this.
Here is how you can install it,
- Download Predator from here.
- Open the installation wizard and follow the given instructions to install it.
- Once it is finished installing, launch it. Now, plug in the USB drive that you want to use to unlock/lock your PC.
- Once you plug it in, Predator will automatically detect it and will show you a dialog box, asking you to create a password. Click OK.
- Now, just create a password by typing it in the Create Password and New Password text boxes.
- That’s it. You can now exact Predator.

