
How to Share Files on Windows Using over a network using just WiFi
One of the most popular trends of the 21st century has been the move to wireless. Technologies like Bluetooth, WiFi, Wireless Charging have quickly annihilated the need for wires, allowing us to share, connect, and even charge our devices without any wires.
Of all these, WiFi has had the biggest impact, quickly spreading to every corner of the globe, from offices to homes to shops and more. Before WiFi, we had to rely on LAN to connect our devices to a network (also including the internet). Now, as long as we are in the proximity of the network’s routers, we can just use the user credentials to connect our device to the internet.
Here, in this guide, we will show how you can use WiFi to share files over a network with any other Windows PC (or even Macs),
Share Files on a Network Using WiFi
On the host PC, or the PC where the file is hosted, you need to perform the following steps,
- Open Control Panel.
- Click on Network and Internet.
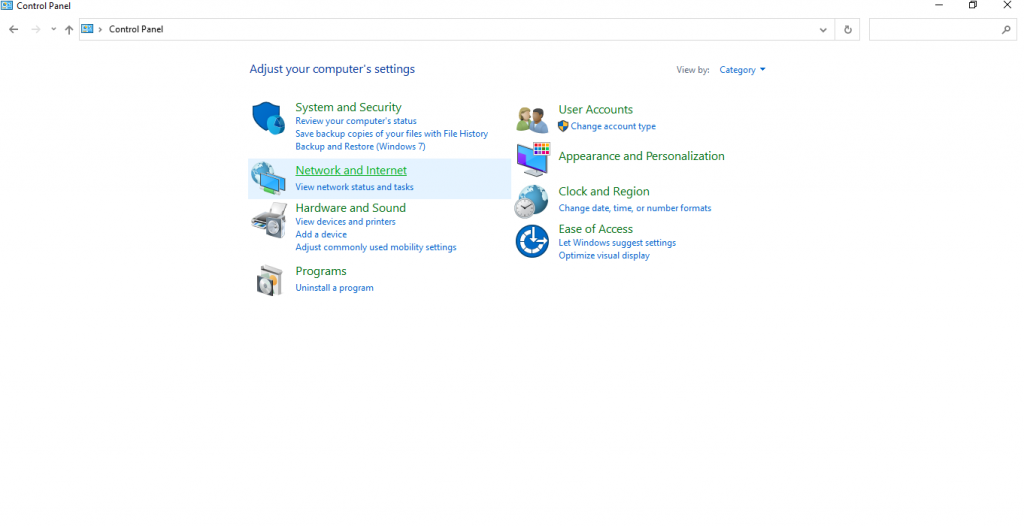
- Click on Network and Sharing Center.

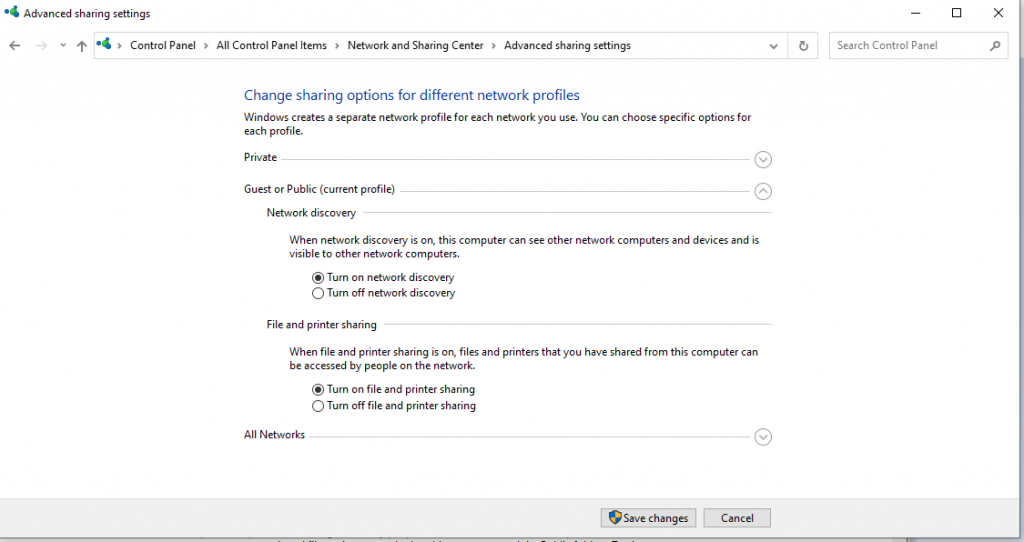
- From the left pane, click on Change advanced sharing settings.

- Under Network discovery, check the box for Turn on network discovery. This will allow devices on the same network to find your device.
- Under File and printer sharing, click on Turn on file and printer sharing.
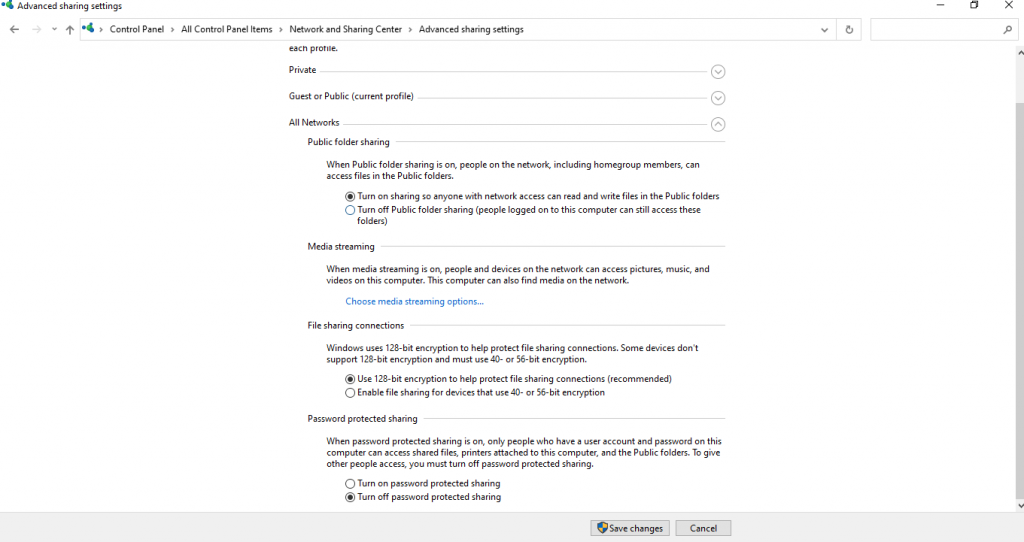
- You can also scroll down to All Networks and select the option for Turn off password protected sharing to allow anyone to access files on the network.
Now, you are all set to share any file or folder you want over your network. Here is how you can share a particular folder,
- Right-click on any folder and click on Give access to.
- Select Specific people.
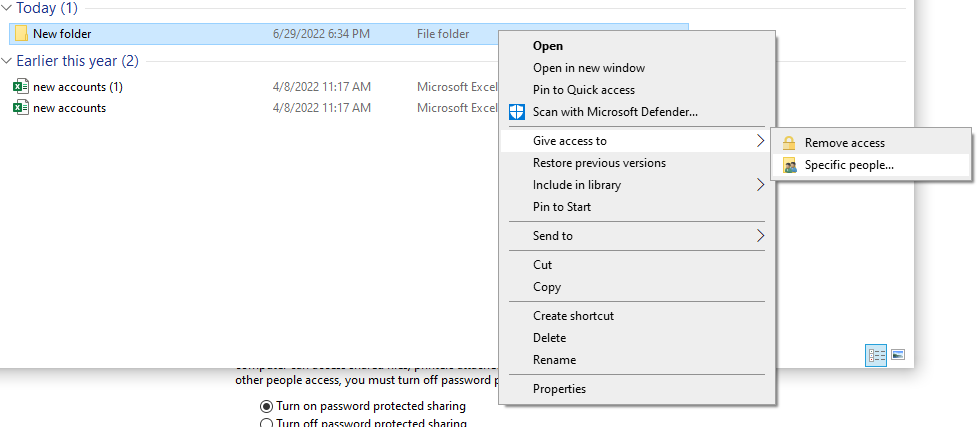
- Now, in the text box, you can select which user you want to give access to. If you select Everyone, the folder will be visible to everyone over the same network.
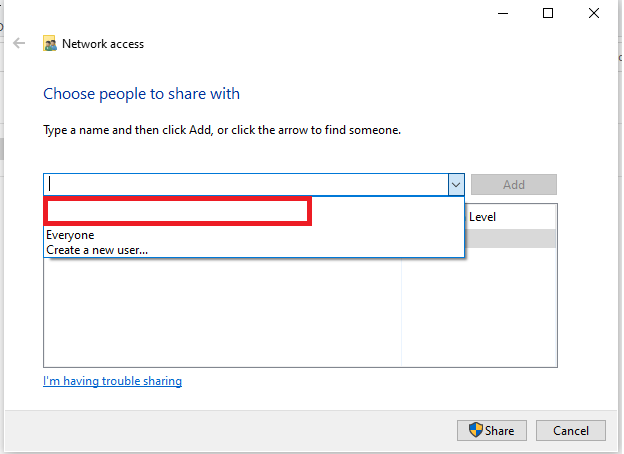
That’s it. Now your file/folder is shared over the same network. We will cover how to access it from another PC or Mac device in another guide.

