Here is how you can enable Enhanced Search in Windows
Windows doesn’t has the best reputation when it comes to search. Sometimes we wish we had a Google search option for our local machines too. Windows search has always been on the slow side and is not really that good at finding what we are looking for. This is because of two reasons; if your machine has a hard drive instead of a flash storage device or an SSD, it adds lots of latency in the search process. Secondly, a search is only as good as the indexing – Google is so good at search just because of its amazing indexing process.
Microsoft has made some strides with indexing your files and folders in Windows and improved the search significantly in recent Windows updates. Moreover, now it also gives you the option to boost up your search by enabling an Enhanced Search option. What this feature does is that it will search your entire PC, including your libraries and desktop to maintain a better, more enhanced index. This process will only be done when your PC is connected to power and is not using significant resources (i.e. not being used for gaming or when disk usage is low).
This enhanced indexing means that when you do need to run a search query, Windows will already know what you are looking for and will not need to sift through your disc to do that. In contrast, the Classic Windows search only searches through your libraries and your desktop. Only if the stuff you are looking for exists there, then it’ll be as quick as Enhanced Search.
So now you know what Enhanced Search is and how it works but how can you enable it? Here, we will show you how you can do that,
Enable Enhanced Search Windows
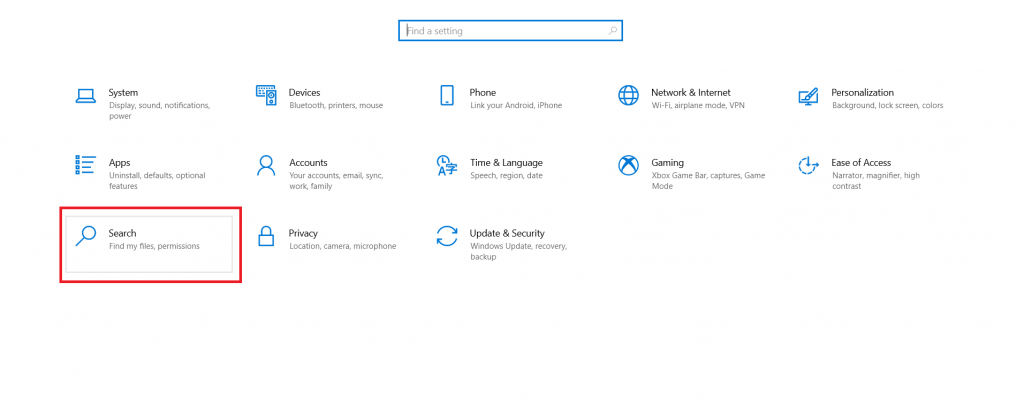
- Open the Settings app and click on Search.

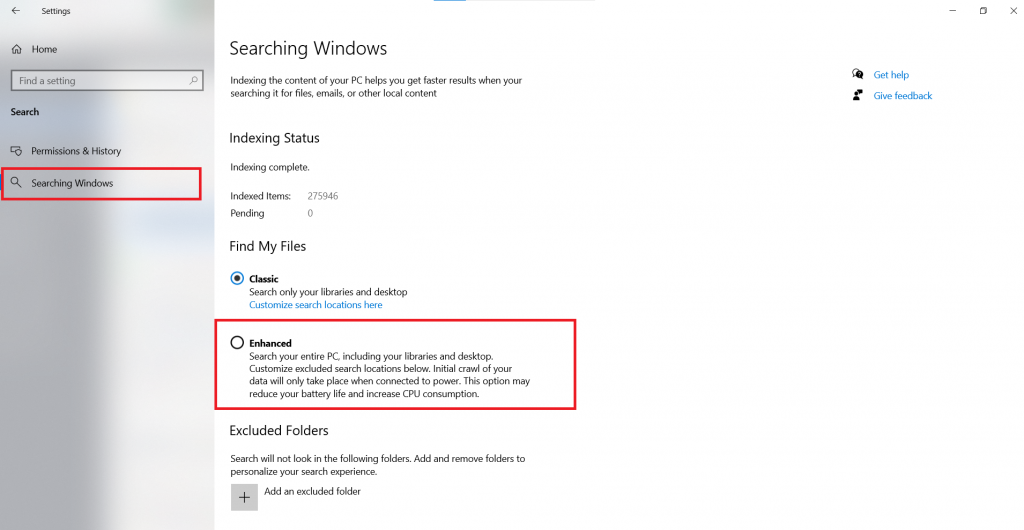
- From the left pane, click on Searching Windows.
- Under Find My Files, check the box for Enhanced.

That’s it. Your PC should now use Enhanced Search Indexing. You can also see the total number of currently indexed items and the ones that are pending under Indexing Status. Moreover, if you want to limit your search to exclude certain folders that you don’t deem necessary (large backup files for example), you can also add these under the Excluded Folders section.

