Here is how you can make your own Windows Keyboard Shortcuts
This is the era of smartphones and touch screens. Everything, be it smart refrigerators or smart TV remotes, is moving towards using a touch screen for input. Why a touch screen? Well because a touch screen can take multiple forms of input – be it gestures or be it taps, it all depends on the UI that is shown on the screen for the user to touch and navigate. This is one of the biggest advantages of the touch screens – the versatility, allowing the developers to be creative while not limiting the user to specific hardware.
However, for proper work, people still rely on PCs and the good old keyboard. Touchpads may have made their way to laptops and some laptops have even introduced smart touch function keys like the Macbook Pro but the keyboard and that feel of clicking a key and snapping away your fingers at blazing speed can’t be replaced by a touch screen. A physical keyboard allows you to get familiar with the layout and being able to tap away without having to look at the keyboard, which is simply not possible in a flat touch screen.
One more huge advantage of having a keyboard is the availability of tons of keyboard shortcuts. From ubiquitous shortcuts like Copy (CTRL+C)/Paste (CTRL+V) to a little more advanced ones for switching tabs (CTRL+TAB) or switching applications on the screen (ALT+TAB), Windows already has enough shortcuts configured to make it hard for one person to remember and use all of them at ones. If you are the kind of person who likes to use multiple screens or switching between multiple active desktops, you will find our guide on using keyboard shortcuts for multiple screens useful.
You can also read our complete guide for all the Windows Keyboard Shortcuts we have come across. Still not satisfied? Well, you can also make your own little Windows Keyboard Shortcuts,
Create your own Keyboard Shortcut to Launch an Application
- Press the Start button and search for the application that you want to launch using your keyboard shortcut. For example, we will use a Keyboard Shortcut to launch Google Chrome.
- Right-click on the application and click on Open File location.

- Right-click on Google Chrome.exe and click on Properties.

- Go to the Shortcut tab.

- Click on the Shortcut key text box, and then press the key combination which you want to use to launch Google Chrome.
- Click on Apply and then click on OK.

That’s it. Now, whenever you press that key combination, it should launch Google Chrome for you.
Create your own Keyboard Shortcut for a System Function
Note: We are going to use SharpKeys, a freely available tool that uses a Registry hack to make certain keys on a keyboard act like other keys.
SharpKeys edits the Windows Registry. Windows comes with a Windows Registry Editor that allows you to make changes but the problem with this is that, if you don’t know what you are doing, you can easily end up messing with some critical system settings and cause other programs (or even the operating system) to go haywire.
The best thing to do before you make any changes is to make a backup, so if you make any undesired changes, you can quickly revert back without causing any permanent harm. You can do it by following our guide over here.
Downloads
- Download SharpKeys 3.5: MSI | ZIP | requires .NET Framework 4.0
- Download SharpKeys 3.0: MSI | ZIP | requires .NET Framework 2.0
You can check your .NET framework by following the guide over here or by following the steps given below,
-
Press START+R to open the Run Menu.
-
In the Open box, enter regedit.exe.
- In the Registry Editor, open the following subkey:
HKEY_LOCAL_MACHINE\SOFTWARE\Microsoft\NET Framework Setup\NDP
The good thing about SharpKeys is that you don’t even need to install the application. Here is how you can use SharpKeys to remap a key on your keyboard,
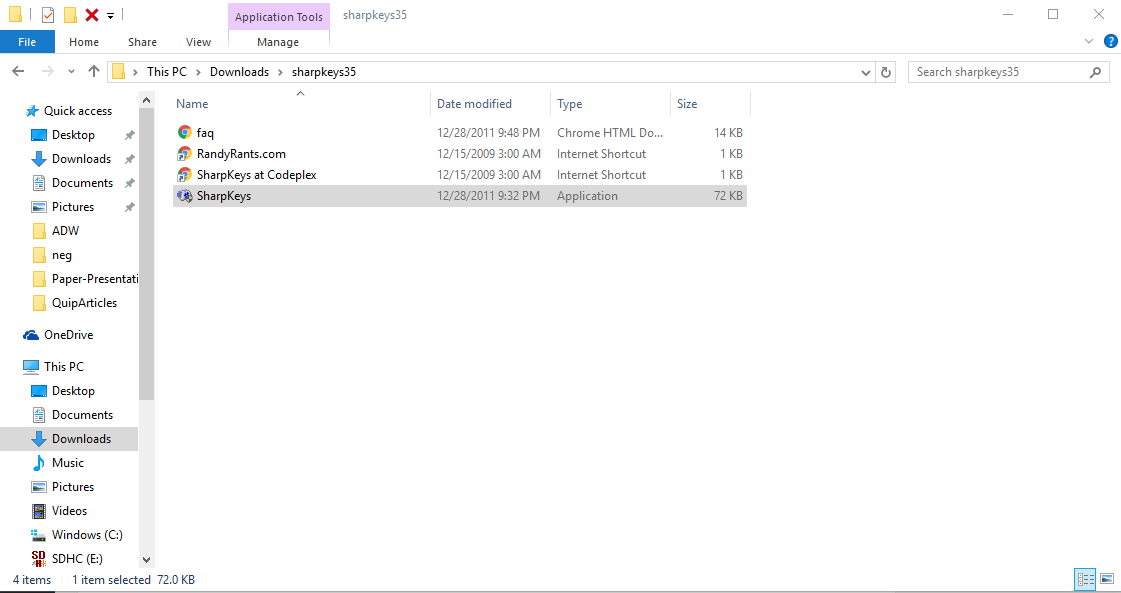
- Just download the ZIP version and open the .EXE file by double-clicking on it, as shown in the image below.

- Launch the application and it will show you all the key remap changes you have made (right now, it will be blank). You need to click on the Add button to make a change.

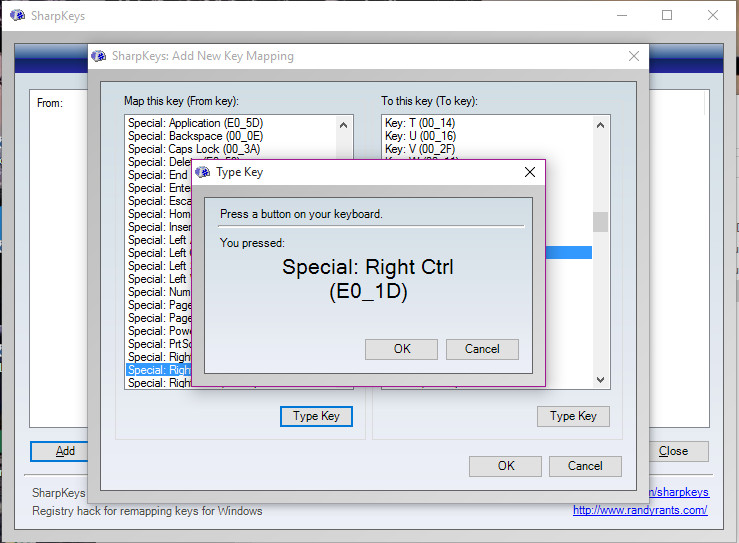
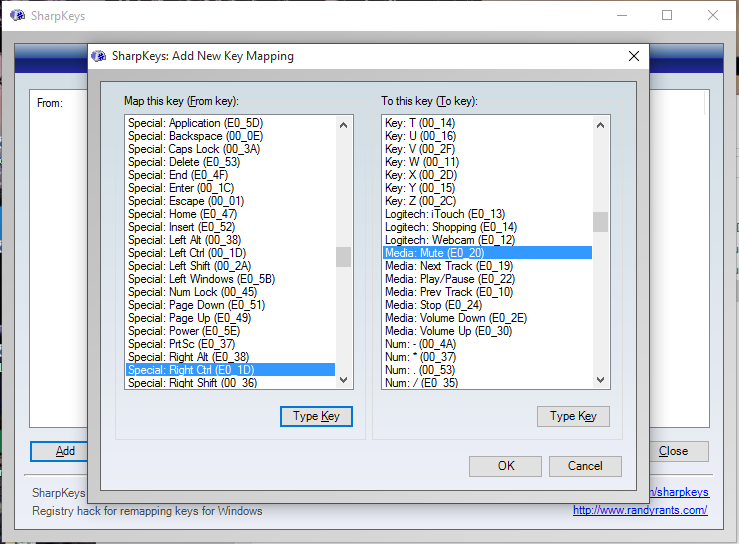
- It will show you two columns, listing down all the keys that you can remap. In the left column, you need to choose the key that you want to map and in the right column, you need to choose the key you want it mapped to. For example, if you want your CTRL key to act a space bar (enter a space every time you press CTRL), you need to select CTRL in the left column and space bar in the right column. There are two ways you can select a key. Either press on Type Key and press the key (which won’t be possible in case of a faulty key) or scroll through the list to select a key.In the images below, I have mapped the Right-CTRL key to act like a Mute button (mutes/unmutes the voice every time I press it).


- Once you have made the desired changes, press OK.
- Now, click on Write Registry to apply the desired changes. You will have to logout/reboot for the changes to go into effect.
That’s it. It is as simple as that. If at any point, you want to undo the changes you made, you can simply open SharpKeys again and Edit/Delete the change you made and then click on Write Registry to apply it.

